 Hi everyone,
You probably have seen these boxes on the blog world. Here's my easter version, with custom mesurement for a cadbury egg. The finished size is 2" X 2".

Begin with a 8" X 6" piece of card stock
- on the 8" side, score @ 1", 3", 5" and 7"
- on the 6" side, score @ 2" and 4"
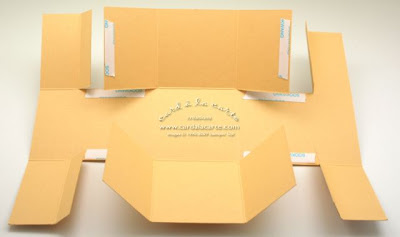
Cut and fold according to this template :
You have to cut at about 1½" from the edge to the 2" and 4" scored lines on both side of the CS. (not sure it's clear, look at the drawing or send me your question !!)
 You will need 5 pieces of 1 3/4" X1 3/4" of DSP. You will need to cut 3 of them in half and glue them as shown on the next picture.

On the other side, you will put some strong adhesive (sticky strip) as shown on the next picture

Fold all creases toward the inside on the box.

First, assemble togheter the middle part.

Now glue each side of the lid.

Here's what it should look like once you adhering is all done.
 If you want to put an egg inside as I did, you will need this little insert, it's a 3" X 3" piece of CS scored @ 1/2" on each side with a hole from a 1 1/4" round punch in the middle.


2 comments:
I am always impressed by how much attention you give to details. For example, how you created the circle for the egg to sit on... It's a beautiful project!!! TFS :-)
Bravo Gen.
Qu'elle belle petite boite ainsi que la décoration, le souci du détail Bravo !!!
Post a Comment