Monday, February 28, 2011

Are-You-Ready-4-Spring Card


Hi everyone,

I don't know about you but I'm just about done with winter. I say enough with the snow -- give us back the leaves in our trees and the flowers in our yards! Just to get me in the mood, I made 2 spring/easter cards.


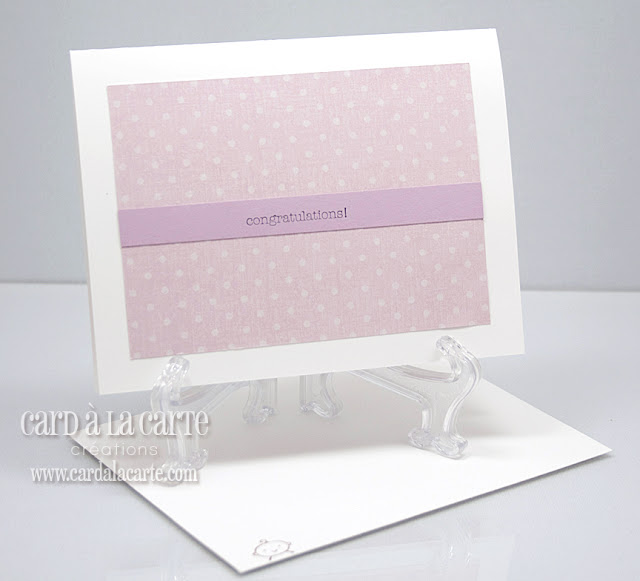
I really don't remember what the paper company is; I'm thinking American Crafts but I can't be sure because the piece was already cut off. I love stamping but sometimes it's nice to take a break from it and let the DSP speaks. That's exactly what I did here. I only added ribbon, a flower and a decorative brad. Pretty simple and quick.

 
I stamped Happy Easter inside the card and a large egg on the envelopes. Those envelopes, by the way, are custom made since the cards are 6" X 6" and I didn't have any that fit the measurements. I used the Martha Stewart scoring board to make the envelopes and I added 2 strips of sticky tape to the inside of the laps. Those are going to a customer of mine and she'll only have to remove to seal the envelopes and ship those cards out. 


Aaaah, those colors are like a breath of fresh air to me.

Have a nice stampin' day !!!

Friday, February 25, 2011

Going digital ?!


Hi everyone,

I'm trying a new thing today, digital scrapbooking, here's my first attemp. The template was from Ali Edward which made my job a lot more easier. Theorically, I just added photos and patterned paper, but because I'm also learning to use photoshop at the same time, sometimes really stupid things like this outiline title, took me at least an hour to create, but i'll get faster for sure...I hope !! 


The first thing I fell in love with in digital scrapbooking, is that you can pick any color from your photos and paint your own paper for an exact perfect match. I picked out the pink from my daugther shoes to make my pink strips of digital paper, so easy and perfect...

Have a nice stampin' day !!!

Thursday, February 24, 2011

Welcome to the World, Baby!


Hi everyone,

You know sometimes you make a card and you're somewhat happy with it but there's a little something that keeps bothering you and you're not totally satisfied with it? This is the story of that card. I was really happy with the focal image -- a montage of stamped items. I was also quite happy with the coloring but the rest of the card was puzzling me. It didn't feel balanced. Nevertheless, I posted it a few months ago and put it aside.

And then I get a request for a baby card. So I took a look at it again and decided to recycle it and I'm much happier now! The stamp set used is Stampin' Up!'s Baby Bundle.


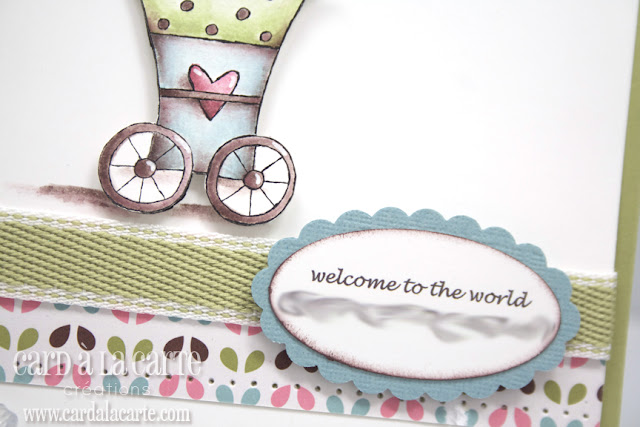
I like the white space created by taking off the top part of the card. The eyes really fall on the baby pram now. And yes, there is a blurred part on the oval tag...


... to protect the full name of the baby. But I really like the idea of putting the baby's full name on the front of the card, as requested by my client.


And staying true to my recent decision, I decorated the inside of the card -- actually it's part of the accent that was on the front! I use and amazing liquid called Un-du to remove anything I want to unglue and this stuff is amazing. It doesn't leave any residue nor discolor the paper. It's also safe for pictures! I get it from my LSS but I'm sure you can find it online as well.

Have a nice stampin' day !!!

Wednesday, February 23, 2011

Friend


Hi everyone,

Here's a quick card thanks to simply scrappin' kit from Stampin'Up! everything is from the Love birds kit except for the sentiment wich is a rub-on from an old hostess simply scrappin kit.


All I added is a little bit of bling with dazzling diamonds and the two-way glue.


Have a nice stampin' day !!!
Tuesday, February 22, 2011

Special Big Sister


Hi everyone,

I've been doing more and more personalized work recently and  it feels me with a sense of satisfaction knowing that  the card I just made will find its way to someone special.


I loved working on this card. This Magnolia stamp was so perfect for a Big Sister card and I had no idea I had it until I started looking through my stamp collection -- does this mean I have too many? The "Big Sister" sticker is the think that set the color combo. It comes from a paper pack by K&Co from a long time ago. So I just chose my Copic markers according to the paper pack. The rest of the sentiment was made on my computer. I also stitched the mat with my little sewing machine.


Of course, big sister needs her bling as well! I added some Dazzling Diamonds Glitter on the wings of the sister and the baby.


I also started decorating the inside of my cards as well as the envelope. Just an added touch that makes it even more special.


Have a nice stampin' day !!!

Monday, February 21, 2011

It's Tea Time!


Hi everyone,

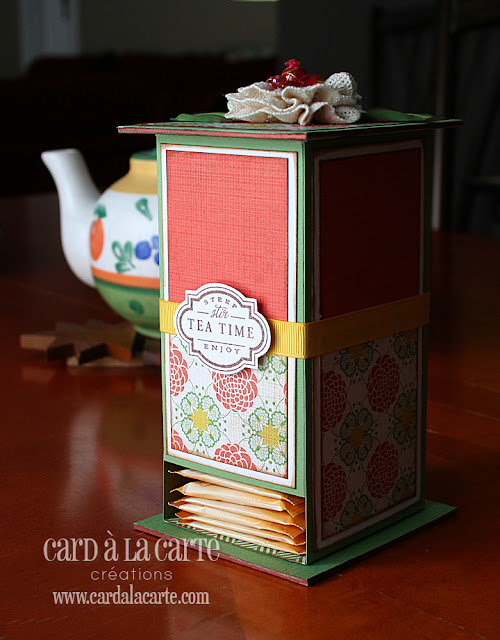
It was on Saturday here in Montreal and I was inspired to make something that would keep me warm. When I saw this project created by Sophia Landry, I knew I had to try and make one for myself (although  I had to tweak the measurements to accommodate my brand of tea bags).


I love the color combination of the the Nook & Pantry paper from Basic Grey and it will fit perfectly with the color scheme in my kitchen (see how it matched one of my teapots in the back?!). The CS I used for the base of my dispenser is Wild Wasabi... again a perfect match for the DSP.


The focal image is from a PapertreyInk stamp set Tea for Two. I stamped it with Memento's Rich Cocoa ink on Stampin' Up!'s Naturals White CS and cut around it. The retired Crushed Curry ribbon from Stampin' Up! is an exact match with the yellow in the DSP.


The design resembles some of the tea boxes you can buy at any store and the wide opening at the bottom makes it easy to refill. I love it! -- Thanks Sophia!


I decided to make my own embellishment for the top out of lace ribbon I got at my local dollar store. I ran a stitch along the top of the ribbon and gathered the ends to make a multi-tiered ruffle. 


I added beads in the center and some leaves out of Wild Wasabi CS. To add some dimension to my leaves, I scored down the middle of each with a bone folder. 

Have a nice stampin' day !!!


Friday, February 18, 2011

Sleepy Owl


Hi everyone,

Today I decided to let myself be inspired by those challenges, Color Throwdown #129 and Mojo Monday sketch # 178.


Here's what I came up with:


I simply stamped the image from Hero arts on Whisper white paper, colored in the challenge colors with ink and a blender pen.Then I simply followed what the sketch was asking for pairing it with some october afternoon patterned paper and early espresso, baja blue and pear pizzaz CS from SU!.


Have a nice stampin' day !!!


Thursday, February 17, 2011

Happy 1st Birthday


Hi everyone,

I've finally had a chance to play with some of the newest Stampin' Up!'s products for the Occasions Mini Catalog. Here's a card I made with the Create a Cupcake stamp set and the Build a Cupcake punch.


How fun! The scalloped circle is from the Scallop Circle #2 die for the Big Shot. The background paper is from the Nursery Suite DSP. I separated the two words of the sentiment adding the "st" to the candle that acts as the number one.


Of course, no little princess should be without glitter so I added some Stickles to the frosting and the candle. A cute little bow tied from a piece of pink seam binding completes the card.

Have a nice stampin' day !!!

Wednesday, February 16, 2011

Happy belly!!


Hi everyone,

Today I made a very easy "Happy belly" card.  I stamped pregabella on watercolor paper, colored it with aquapainter and classic ink. Then I simply mounted her on monochomatic squares of patterned paper. I little ribbon and ...DONE!

Have a nice stampin' day !!!

Tuesday, February 15, 2011

For a Funky Mother


Hi everyone,

I swear sometimes I feel like I'm suffering from split personalities. Yesterday's project was all shabby chic and today.... THIS !


Is there a cure for this?! This card is so far away from the frame of mind I was in yesterday. It's all about poppin' vibrant colors and I quite like it. The main color is Melon Mambo and the border at the bottom was punched with a Martha Stewart punch (large double punch arches combo set). I created the background with an image from SU's Fifth Avenue Floral that I repeated, masking along the way to create a grouping of flowers. The image was inked with Whisper White  Craft Ink and outlined with a Copic marker (#RV19). I didn't come up with this technique; I saw it on Nichole Heady's blog. I lovedhow it turned out.


Of course, I had to add some bling. The sentiment was first stamped with Versamark over a piece of vellum then heat embossed it in white. The two score lines at the top and bottom of the vellum helps to mask the score tape underneath (another idea I stole from Nichole!).

So now I just have to find a funky mom to give this to on Mother's Day!

Have a nice stampin' day !!!

Monday, February 14, 2011

A "Hearty" Wish


Hi everyone,

Since Valentine's Day is not a holiday that is celebrated in my household, I decided to honor it in my own way. I made myself an inspirational heart to hang in my craft room. My main tool for this was SU's Petal Cone Bigz Die for the Big Shot. When you use this die, you're supposed to cut 2 of this heart shape and it has crease lines to assemble your cone. As it turns out, when you cut only 1 shape you end up with a heart! And this is how I've decided to use it.


I used a retired DSP for the heart and backed it up with a piece of cardboard for reinforcement. I added Champagne Glass Glitter around the heart and inside the circle shape with some liquid glue to make it look vintage.


The "wings" around the circle is actually a scallop half-circle from the same die that I cut in half and adorned with half-back pearls. The ribbon is a long piece of seam binding in Very Vanilla that I sprayed with water and crinkled in my hand for a more vintage look. I let it dry and it stayed wrinkled. I love the effect. The double bow is tied in the middle with a piece of baker's twine.


The resin flower is a new SU product and I'm absolutely in love with it.


The sentiment and circle image is from CTMH. I love that quote and accented it with tiny sticky back pearl. This little piece of art will be hanging in my craft room -- which reminds me that I'll need to paint my walls because it doesn't fit with my recent projects! LOL

Have a nice stampin' day !!!