Showing posts with label tutorial. Show all posts

Friday, November 26, 2010

Sparkly Fun Friday -- Less Sparkles, More Fun... and a Sale!


Sparkly Fun Fridays features a sparkly or glittery project using shimmer paints, embossing powders, glitters, rhinestones... anything shiny to welcome the weekend in a fun way!!!

Hi everyone,

I wasn't in the mood for sparkles or glitter today... can you believe that?! Plus, I had this idea roaming around in my head so I thought you wouldn't mind if I strayed from the usual Friday post. And get this: I sewed!!! Yes!!! Me! The one that has a love/hate relationship with her sewing machine. I took my courage and dug out my Sew Mini. Up until now, I was very happy to leave all that sewing to my partner in crime, Gen. And my mind is not usually geared towards "haute couture" projects but for some strange reason, this idea came to me during one of my late nights working.

So I dug out Card à la Carte's Cute and Cubby Tutorial (yes, I needed to follow my own instructions!) and modified it to add a cover.


Please don't look at it my sewing too closely... it is far from being perfect. But I didn't do too much of a bad job considering that I don't sew. So, as I was saying, I added a cover because I wanted my Cute and Cubby to look like a present. I also added a satin ribbon to form a bow over the cover and made only one pocket adorned with a flower.

What's inside, you ask? That's what got me thinking in the first place.


Coasters! Made with remnants of the fabric and the Scallop Circles #2 Bigz Die for the Big Shot!!! I also sandwiched some batting in between the two layers of fabric ... actually, I didn't have any batting so I used Swiffer Refills - HAHAHA! Talk about being creative! Then I just over-stitched all the layers.


What do you think?! Not bad for an inexperienced sewer, right?! And if I can do this... EVERYONE can do it!

Then I went a step further and thought to add a pocke to my Cute and Cubby and where you can put glass rings. You know, those things that lets you keep track of your glass when you're at a party so you don't accidently drink out of other people's beverage? I made mine out of a stamped image from  Stampin' Up!'s Just Believe Stamp Set and shrink plastic. I stamped with Black StazOn and colored them all a different color with permanent markers.


So all in all, this makes for a VERY SPECIAL GIFT for that very special someone at Christmas. I also added a some cocktail napkins in a coordinating color to complete the whole thing. 

Oh, and that cute fabric is the Candy Cane Christmas from the Holidays Mini Catalog from Stampin' Up! 

2nd Oh... Plus, it's on special right now: 6.25$ instead of 12.50$ -- that's 50% off!!! Win-win! Just send me an email if you'd like to order the fabric.


On the front pocket, I added a fabric flower made with the same Scallop Circles Die #2. Fun, fun, fun!!!

I hope this idea inspires you to create Christmas gifts. After all, there's nothing that says "I love you" more than an handmade gift! If you're interested in the Cute and Cubby Tutorial, now's the time to grab it. All of Card à la Carte's tutorials are discounted until Monday night, 11:59 p.m. Eastern Time.


Have a happy Black Friday everyone !!!

Sunday, November 14, 2010

Announcing a new Tutorial: the Gift Companion!


Are You Tired of Giving the Same Old Hostess Gifts? 
Why Not Kick It Up a Notch?! 

 Picture this if you will...

You’ve probably already been invited to a number of dinners or parties this year. Of course, you’re going to bring a hostess gift... perhaps a bottle of wine...... That’ll work... BUT it really doesn’t stand out from the crowd, does it!? If you’re interested in taking your gifts to the next level, read on....

Here’s another scenario...

Books are one of the most popular gift ideas for the holiday season -- I know... I’ve waited in line often enough at bookstores to witness that fact. Maybe you’ve got a serious list of books to buy for your loved ones. Wouldn’t it be nice to add your personal touch to those gifts?

If you can identify with one or both of these scenarios, then the

Gift Companion Tutorial 

is for you!


This tutorial will show you, step-by-step, how to create easy, inexpensive and lovely gifts that’ll get you notice for your thoughtfulness and creative talent!

And get this -- it comes in 2 complete designs!!!

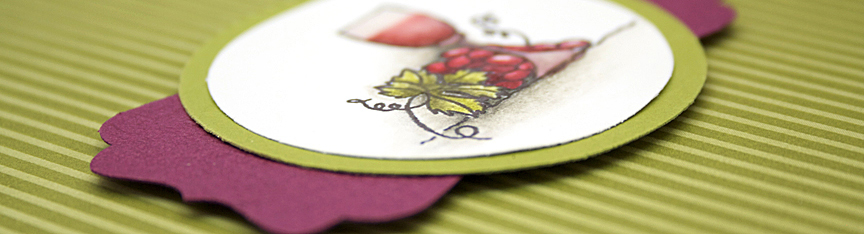
  • The Wine Connoisseur Companion is the perfect addition to that bottle of wine you’ll be giving as your next hostess gift. He/she will be glad to have this special “book” in which to record useful information and impressions on favorite wines. Hand in a beautifully presented Wine Connoisseur Companion at your next invitation and become an instant hit with your hostess!
  • The Book Lover Companion is ideal for that avid reader in your life. It helps them keep track of single title books they’ve read, as well as book series. There’s even a Wish List template included!

Here’s what you’ll get with the Gift Companion Tutorial :

* supplies list and cutting instructions
* 14-page step-by-step instructions, each step accompanied by high-quality photos helpful tips and shortcuts
PLUS
* 13 pages of templates, including:
  • Wine Connoisseur Companion title, bookplate and original artwork for creating a single project
  • Wine Connoisseur Companion title for creating multiple projects
  • Wine Connoisseur Companion bookplate for creating multiple projects
  • Wine Connoisseur Companion original artwork for the book cover for creating multiple projects
  • Wine Connoisseur Companion index cards for rating and cataloging red, white and sparkling wines
  • Book Lover Companion title and bookplate for creating a single project
  • Book Lover Companion title for creating multiple projects
  • Book Lover Companion bookplate for creating multiple projects
  • Book Lover Companion index cards for cataloguing single titles
  • Book Lover Companion index cards for recording book title for series
  • Book Lover Companion Wish List


ALL THIS... for just 24.95$ by clicking the Add to Cart button below. And as a bonus, you’ll also receive an additional mini-tutorial...


If you’re a Stampin’ Up! Demonstrator
or a stamping, scrapbooking 

or paper crafts teacher, 
you’ll want to read further...


       This Gift Companion is a fantastic alternative to a regular cards class. It’s a never-before-seen project!

Let’s assume that you normally charge 20-25$ for a regular cards class. You’ll be able to offer this gift idea class for 10$ more, easily! Imagine the profit! And because it’s so inexpensive to make, your profit for margin will be significantly increased!

What’s more -- because we’ve done all the groundwork for you by providing you easy to follow step-by-step instructions and templates, you’ll save on time!

 It doesn’t get any better than that!

Squeeze in this class before the holidays and your customers will love you for it!!

Just click on the Add to Cart button below and in less than 5 minutes, start planning your next class!

Wednesday, September 8, 2010

My Little Book of Stamps *** New Tutorial!

We interrupt our regularly schedule to bring you our latest offering !!!

Hi everyone,


Let us ask you a couple of questions:


  • do you feel OVERWHELMED (like us) about your ever-growing collection of stamps?
  • do you feel like you're spending too much time looking for that specific image that you KNOW you have but can't quite locate when you need it?
  • do you wish you had a fool-proof system that would help you get and stay ORGANIZED?
  • ever wished you had your list of stamps in a format that's small enough to carry around with you on your next shopping trip to avoid buying duplicates?
  • do you find yourself wishing someone could SHOW you how to do just that?

If you've answered yes to most of these questions... then help is on the way!


We're proud to introduce to you Card à la Carte's latest tutorial:


My Little Book Of Stamps


This time around we've decided to add something extra. Above and beyond the step-by-step instructions with photos, we've dedicated a whole page to organizational ideas to get you started on the right foot and help you maximize the use of your stamp collection. We've also added a bonus template for an Index Sheet that you can print in however many copies you'd like PLUS a bonus mini-tutorial!

We're sure you're gonna like this tutorial. CeeCee liked it so much she decided to make one just for her Christmas stamps... yeah, can you say too many?!!!! Nah, you can never have too many stamps :-)

To purchase the English Tutorial for My Little Book of Stamps, just click on the button below. To purchase other goodies, please click on our Shop with Card à la Carte button underneath our blog banner!


Friday, August 6, 2010

Sparkly Fun Friday -- Make your Own Glitter Embellishment

Sparkly Fun Fridays features a sparkly or glittery project using shimmer paints, embossing powders, glitters, rhinestones... anything shiny to welcome the weekend in a fun way!!!


Hi everyone,

What do you do when you can't find the right embellishment? You make it! Today's Sparkly Fun Friday sparkles, shines and glitters! This is the card I gave Gen for her birthday. She's been dealing with 2 sick kids and a long heat wave so I thought she could use a little glitter in her life right now... well a lot of glitter, actually.

I had an idea of a cake embellishment with different colors of glitter and it was obvious that I'd have to make it to get exactly what I wanted. My inspiration for the colors was the patterned paper with its bright colors. So I reached for Stampin' Up!'s Sticky Pages (#114300) my basket of glitter and went to work.

Here's how I did the cake:

Step 1: I drew the cake on the reverse side (white side) of the Sticky Page and cut around the image. I then removed the pink plastic protective layer and glued the embellishment on white cardstock.
Step 2: Using the Hobby Blade peel the first layer of the drawing you want to glitter to expose the adhesive, taking great care not to cut through all the layers of paper. It actually is easier that it looks!

Step 3: Sprinkle orange glitter over the exposed area.

Step 3: Repeat Step 2 for as many layers of colored frosting you have. Once done, remove all the lining of all the other areas which will be glittered with Stampin' Up!'s Dazzling Diamonds.

Step 4: Sprinkle Dazzling Diamonds all over the exposed adhesive. Shake off the excess glitter.

Step 5: Cut around your image, leaving a white border, and you're done!


Imagine all the possibilities using the Sticky Pages. I think they're fantastic. They also can be cut with the Big Shot die-cutting machine. I've used it in the past to create glitter flowers, like in this post here. Ooooh, the possibilities are endless! So I hope you try this technique and have fun coming up with your own embellies. Let us know how they turn out!

Have a nice stampin' day! CeeCee

Friday, July 23, 2010

Announcing a new Tutorial: the Cute 'n Cubby!


 It's decorative, practical, portable and cute. And it's so easy to do! Introducing the

Cute 'n Cubby


The organizer cube Cute 'n Cubby measure approximately 4" all around and can be used to store a plethora of small and medium-sized objects that you want to keep close at hand, such as:
  • stamping supplies
  • crafting supplies
  • coloring pencils, pens, markers
  • make-up
  • small cooking utensils and tools
  • small notebooks and writing pads
  • office supplies
  • and much more...


The 5-page tutorial, complete with photos, will take you step-by-step through the process of making your very own Cute 'n Cubby. You don't need an expert seamstress to make one; this level of tutorial is for any beginner and all other levels! And since the whole thing is made using a straight stitch, you don't need a fancy sewing machine. What's more? It can be done under an hour!

Since the fabric is cut using Stampin' Up!'s Scallop Square Bigs Clear Die (#115950) for the Big Shot, this seriously reduced the amount of time it would normally take to prep for this project. Imagine the fun you'll have using fabric of all kinds of color and pattern!


And because the Cute 'n Cubby folds back into a neat little package, it's totally portable. Bring it with you at your next demo and put it in the center of the table filled with all the tools you'll need for your projects. It's more than an organizer -- it's a sales tool as well! What better way to get your customers excited about the Big Shot by showing them all the possibilities it offers -- cutting paper AND fabric.

Want a neat gift idea for your family and friends? Why not offer them a Cute 'n Cubby so they can organize their supplies in a fun and decorative way!

To buy the Cute 'n Cubby English tutorial for 11.95$ CAD, please click the Add To Cart button below!

Sunday, March 7, 2010

Weekend Special -- Coffee Cup Cozy Tutorial


Happy weekend everyone!

Once in a while, we'll be posting on the weekend when we have something special to share with you. Today, I'd like to show you how we came up with the Coffee Cup Cozies from this post using the Big Shot die-cutting machine.

Step 1 --

With the Baskets & Blooms Bigz XL Die (#113484), you will cut 3 pieces of felt. For that, you'll need to run your die twice since you get 2 basket pieces in one pass. You can double up your felt to get 4 pieces if you're making more than 1 cozy. Tip: Keep the extra pieces you get from the cut (like the flower and the circles from the handles) to make flower embellishments!

Step 2 --
Pin together your pieces as show above making sure that the top and bottom of each piece align properly.

Step 3 --
Cut excess fabric as show, just below the handle. At this point, you can trace with a chalk pencil if you don't have a steady hand.


Step 4 --
Using a contrasting thread, sew your pieces together using a jeans seam.

You can also run a straight stitch or a decorative stitch along the top and bottom of your felt for an added touch.

Step 5 --

Using a hot glue gun, decorate with your favorite embellishment. You can use the felt from Stampin' Up!'s Flower Fusion kit (#110720), Sweet Pea Stitched Felt kit (#117266) or your own handmade felt flowers.


We hope this inspires you to create your own cozy.

In case you're feeling lazy or simply don't have the proper equipment to make them, head on over to our Etsy shop where you'll be able to buy our cozies! They've already started selling and we only have 25 left so grab them while they're hot! They're cute and fit into your handbag or a coat pocket. Offer them as gifts to your dowline and your family!

Happy Sunday! CeeCee